 EN
EN
 AR
AR
 BG
BG
 HR
HR
 CS
CS
 DA
DA
 NL
NL
 FI
FI
 FR
FR
 DE
DE
 EL
EL
 HI
HI
 IT
IT
 JA
JA
 KO
KO
 NO
NO
 PL
PL
 PT
PT
 RO
RO
 RU
RU
 ES
ES
 SV
SV
 TL
TL
 IW
IW
 ID
ID
 SR
SR
 UK
UK
 VI
VI
 HU
HU
 TH
TH
 TR
TR
 FA
FA
 MS
MS
 GA
GA
 IS
IS
 LA
LA
 MN
MN
 NE
NE
 KK
KK
 UZ
UZ

Hey there, kids. So today, we are going to talk about how to install thermal insulation pin. These fasteners are useful as they ensure you have a nice warm home in winter. When your home has good insulation, it keeps heat from escaping and keeps your home a nice place to be. Let’s combine it all and go over how to do this step by step.
Process of Installation of Thermal Insulation Fasteners
Assess your area: The first step is to take measurements of the area in which you would like to apply thermal insulation. This is relevant because the size will determine how much insulation/fasteners you will need. Get the right measures using a measuring tape
Mark the Spots: Finally, you’ll want to mark the locations of the foam board fasteners. You can take a pencil or a marker and make small dots or lines indicating, where each fastener is going to be. This will help you to remain organized and will indicate precisely where to drill.
Drill Holes: Next, use a power drill to drill holes in the marked spots. If you are unfamiliar with drills, please ask an adult for help. Safety while drilling is a priority.
Drilling the Holes: You can install the fasteners into holes you drilled after you made the holes. Ensure that you push them in so they are locked in place. This helps keep the insulation where it’s supposed to be.
Apply the Insulation: Finally, lay the thermal insulation on top of the foam fasteners and attach it firmly. It is a crucial step in making sure if you want your insulation to stay where it is supposed to make your house nice and warm.
Where to Place the Fasteners
Placement of the fasteners in the correct locations is very critical. They should be set in a grid arrangement. What this means is that you will put them in straight line both top to bottom, and left to right. Space each insulation fasteners approximately 12 inches from the other. This spacing supports the insulation uniformly over the surface to prevent sagging or falling down. There are times when insulation is very well secured and it will do its job retaining the heat in your home.
Install Fasteners Tight — Here’s Why It Matters
Without tight stores, the insulation can fall or become looser. This can allow heat to leave your home, meaning it will be chillier inside. A cold home requires extra heating to warm it up, resulting in higher heating bills. Device Installation Employee: No one wants to spend money in vain, and it is very important that every piece of equipment is installed correctly.
Tips for Installing Fasteners
THESE TIPS ARE USEFUL WHILE YOU INSTALL THE FASTENERS:
Drill holes in the spots you marked. Be cautious for when you use the drill.
Space the fasteners in a grid pattern approximately 12 inches apart. This is going to be helpful to balance the weight of the insulation.
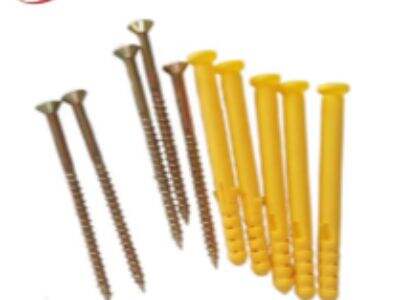
Here are the fasteners you will need: Make sure you have the correct fasteners for your type of insulation. Different insulations require different fasteners, so make sure before you begin.
Always refer to manufacturer instructions for installation. They know what is best for their products.
Remember to wear safety goggles and gloves when you’re drilling and installing. Safety first.
Advice from Experts
Experts said it’s important to select the correct type of fasteners for your particular insulation. Different insulation materials require various fasteners for installation. When in doubt, it's always worthwhile to consult with the manufacturer or a professional before purchasing anything. Book a consultation to determine the best options for your home.