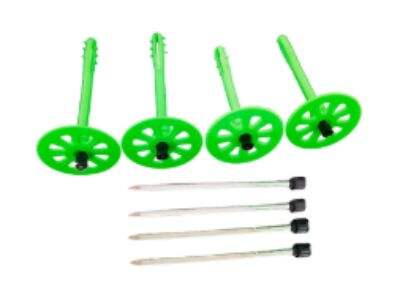
Particularly during these cold winter months, maintaining the warmth and comfort of our homes twenty-four hours a day is important. Insulating walls, ceilings, and floors is one great way to keep your house warm. Your insulation keeps warm air trapped inside and cold air locked outside. But do you know that there is a special tool called insulation anchors that can make your insulation even more effective? These anchors secure everything down, hence it insulates so well. In this step-by-step guide you will discover how to install anchor insulation and some useful Yifang expert tips.
What Are Insulation Anchors?
First things first — what are insulation anchors? The insulation anchors are little devices that keep the insulation in place so they don't fall out. These are constructed from different materials - metal, plastic etc and they come in various shapes and sizes. They are like little sidekicks that keep the insulation in place and don't cave in when you most need them.
Insulation Anchors Installation Steps
Now, below are the steps for a proper installation of insulation anchor:
Utilize a Tape Measure: Measure the zone where you will install the insulation. It is a crucial step, as it will decide the location of anchors, so proceed slowly and do it precisely.
Drill a Hole — You will have to use a power drill and make a hole in the marked area after taking the measurement. Use proper usage and safety standards while working with the drill.
Place Anchor: Once you create the hole, it's time to insert the anchor for insulation into the hole created. Insert the anchor, ensure that it's level with the surface. This is important so that the anchor will be able to function well.
The exact same thing for every anchor, repeat. Be consistent with the spacing of the anchors to keep it all neat and orderly.
Insulate: Finally, once all the anchors have been installed, you can install the insulation over them. Tap the insulation down gently so that it is in snug contact with the anchors.
The Importance of Insulated Snap Anchors
Now that you have the know-how to install insulation anchors, let's discuss why they are so important. Insulation anchors keep the insulation from sagging. When it is held tightly in place, the insulation works better because it is in contact with the surface that is being insulated. When properly done, this is intended to trap warm air in during the winter and cool air in during the summer. That's beneficial to your home, as it means your heating and cooling systems don't have to work as hard. When they do less, it saves you a lot of energy and money on your bills.
Instructions for Installing Insulation Anchors
Make your insulation work its best with these tips from Yifang:
Install Enough Anchors: you must install enough anchors that allow the insulation to be securely fastened. If you are installing on a large area, remember that you will have to use more anchors to do it right.
Bottom Line: Use anchors of the correct size for your insulation. If your anchors are too small, external wall insulation fixings the insulation will not be held in place. They must be kept small enough that they will not injure the base that they will be glued to, however.
Picking the Right Thickness: Ensure the insulation you're working with is the correct thickness for the task. Too thin, and it will not keep your house warm or cool that effectively. And too thick, it might be tough to apply, which can cause issues down the line.
More Tips for Installing Insulation Anchors
Here are some additional tips to ensure that you install the anchors properly and safely:
Safety Precaution: Ensure that you are wearing proper safety equipment, such as gloves and goggles, when installing insulation anchors. And these will help keep you safe working.
Use Non-Conducting Washers: If using metal anchors Make sure to use non-conducting washers. Such pauses keep the anchor away from metal surfaces, which can lead to shorts or fire.
Proper drill bit size: When drilling the holes for anchors, make sure you are using a drill bit of the same size as the anchor. It keeps the anchor in close and does not let it slip or fall out.
We have the Best Tricks to Make Your Installation Look Great
For professional looking insulation anchors, try these tips:
Install in a straight line: Ensure that you end up external insulation fixings installing the anchors aligned with the evenly spaced apart. Not only will this look better, it will also enable the insulation to fit properly.
Use a Level: You should apply a level in order to ensure that the anchors were installed straight. That prevents the insulation from bunching or sagging (which can decrease its effectiveness).
Trim excess material: Once you have installed the anchor insulation, use a razor knife to trim away any excess material around the anchors. This will make your installation look clean and professional.
 EN
EN
 AR
AR
 BG
BG
 HR
HR
 CS
CS
 DA
DA
 NL
NL
 FI
FI
 FR
FR
 DE
DE
 EL
EL
 HI
HI
 IT
IT
 JA
JA
 KO
KO
 NO
NO
 PL
PL
 PT
PT
 RO
RO
 RU
RU
 ES
ES
 SV
SV
 TL
TL
 IW
IW
 ID
ID
 SR
SR
 UK
UK
 VI
VI
 HU
HU
 TH
TH
 TR
TR
 FA
FA
 MS
MS
 GA
GA
 IS
IS
 LA
LA
 MN
MN
 NE
NE
 KK
KK
 UZ
UZ


